This is a repost from a couple of years ago. Enjoy!
I don't know what these toys are called. I remember loving to play with them when I was a child though.
These are quick and easy to make. Plan on spending 30-40 minutes making them.

Supplies you will need:
A box with a lid.
Cardstock to stamp your image on plus extra cardstock to mount on the back of that.
Ribbon, stamps, glue, ink, double sided tape, hole punch, bb's, and acetate (overhead transparencies).

Begin by trimming your cardstock so it will lay flat in the bottom of the box.
Stamp your image. I used snowflakes here. After stamping, mount that piece onto another piece of cardstock, and again, onto another piece of cardstock. You will have three (3) layers now.

Punch your holes through all three layers. I punched my holes in the center of the snowflakes.
If you were using cars you could punch the center of the tires, etc.
You'll need holes for however many BB's you're planning on using.

Now you need to glue this piece into the bottom of your box.

Cut your acetate so it will fit onto the top of the box.
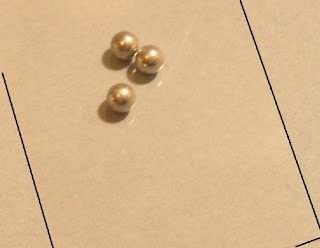
The black lines here are just to show where the acetate is as it was hard to tell.
I had to make sure my acetate fit perfectly or else I couldn't get the top on my box.
Place your BB's in the center of the acetate, place glue on the rim of the bottom of the box and lay the box on the acetate. Weigh it down until dry.

Now your box should look like this. The BB's are "locked" inside.

Now you can decorate the lid if you want. I added ribbon around the edge, using the double sided tape makes it quick. Then I stamped a snowman on the top.

Viola!! A cute little present to put in my daughter's Christmas stocking.
I would not recommend this for young children as the acetate is easy to remove and the BB's could be swallowed.

 I love this technique. It is super easy and looks great!!
 This is a repost from a couple of years ago. Enjoy!
 Supplies you will need:


 Now your box should look like this. The BB's are "locked" inside.

 This is not quite the card I had imagined in my head. It was supposed to be straight, everything lined up perfectly. But, since we don't live in a perfect world, my matting ended up crooked...not a lot, but enough to be noticeable.

