Saturday, December 18, 2010

Birthday Card


I really like the way this card turned out. The scallops were cut on my cricut and the stamps are from Stampin Up!. I can't remember who the paper is by.

Friday, December 17, 2010

Mirror Image

I love this technique. It is super easy and looks great!!

All you need are your stamps, ink, paper, and a piece of acetate (overhead transparencies).

Stamp your image on your cardstock, reink and stamp on the acetate.

Turn the acetate over (so the ink is down), link up with the image you stamped on the cardstock, carefully place the acetate down and gently rub.

You get a perfect mirror image!!

When I colored this one I used a light touch for the snowmen on the ice.

Hope these are clear enough directions for you.

Tuesday, December 14, 2010

Old Fashioned BB Game

This is a repost from a couple of years ago. Enjoy!

I don't know what these toys are called. I remember loving to play with them when I was a child though.

These are quick and easy to make. Plan on spending 30-40 minutes making them.


Supplies you will need:

A box with a lid.
Cardstock to stamp your image on plus extra cardstock to mount on the back of that.
Ribbon, stamps, glue, ink, double sided tape, hole punch, bb's, and acetate (overhead transparencies).


Begin by trimming your cardstock so it will lay flat in the bottom of the box.

Stamp your image. I used snowflakes here. After stamping, mount that piece onto another piece of cardstock, and again, onto another piece of cardstock. You will have three (3) layers now.


Punch your holes through all three layers. I punched my holes in the center of the snowflakes.

If you were using cars you could punch the center of the tires, etc.

You'll need holes for however many BB's you're planning on using.


Now you need to glue this piece into the bottom of your box.


Cut your acetate so it will fit onto the top of the box.

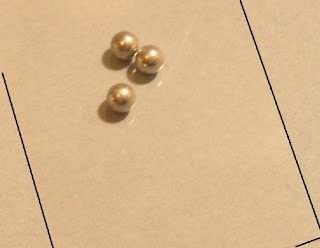
The black lines here are just to show where the acetate is as it was hard to tell.

I had to make sure my acetate fit perfectly or else I couldn't get the top on my box.

Place your BB's in the center of the acetate, place glue on the rim of the bottom of the box and lay the box on the acetate. Weigh it down until dry.


Now your box should look like this. The BB's are "locked" inside.


Now you can decorate the lid if you want. I added ribbon around the edge, using the double sided tape makes it quick. Then I stamped a snowman on the top.


Viola!! A cute little present to put in my daughter's Christmas stocking.


I would not recommend this for young children as the acetate is easy to remove and the BB's could be swallowed.

Mistakes are good

This is not quite the card I had imagined in my head. It was supposed to be straight, everything lined up perfectly. But, since we don't live in a perfect world, my matting ended up crooked...not a lot, but enough to be noticeable.

So when your mats are cock-eyed, put everything at an angle and who can tell??!

The topiary was cut with my cricut and I used Flower Soft to give it color and dimension. You can buy it most anywhere or online at flower-soft.com.

The stamped saying and ribbon are from Stampin Up.

Saturday, December 11, 2010

Nativity Gift Tags


I purchased my first SVG file. It was such a good deal! I bought it at SVGCuts.com for only 6.99. It's called O Holy Night and it has the entire nativity...Mary, Joseph, baby Jesus, 3 wise men, 2 shepards, animals, manger, and different sayings.

I've made some gift tags with it so far.

I ran the tags through my Cuttlebug with a snowflake background embossing folder.

The multi-colored parts on the wise man is actually shiny paper and the angel wings are done up in fun flock.

This has quite a bit of paper piecing but it comes with great instructions and a full color picture to show the final product.

Thursday, December 9, 2010

Birthday Card

A quick and simple birthday card for the person who really likes green!!

The string for the balloon is scrappers floss and the white highlight is a white sharpie.

The stamp and ribbon is from Stampin Up!

The balloon and white portion where cut on my cricut.

Tuesday, December 7, 2010

Cuttlebug


I used my Cuttlebug and the "under the sea" dies and embossing folders. This was my first attempt to line up the die and use the embossing folder too.

I actually think the background paper has stolen the show on this one.

I picked it up when we were camping this summer.

Monday, December 6, 2010

Mixer Card

Can you tell what my sister is getting for christmas? I cut this image with scal and my cricut. It's kind of hard to tell but the "for you" and the strips on the mixer and very shiny!! I pulled the shiny cardstock from a toy that my kids received.

Wednesday, November 17, 2010

Bow Easy


Have you heard of the bow easy tool? I just watched this video on Stamp TV and this is definitely one tool I am going to have to get!! I love the idea of being able to make perfect bows! It comes in two sizes; small, which will make good bows for cards and scrapbook pages and large, for packages and wreaths!!

Monday, October 25, 2010

Final Christmas Card

This is the card that hubby and I decided on for this year. This card has the sentiment printed with my Cricut using Cri-kit pens but that didn't work so well as the gel pens don't like the printed paper very much.

I just printed "merry christmas" on the paper with my printer, cut the tree and star with my Cricut and punched the christmas balls with a small hole punch.

You can't see it in the picture very well but the tree, star and christmas balls are all done with glitter paper.

Simple but we like it!

Friday, October 22, 2010

More Christmas cards

Here are three more "trial" cards. The santa card started out as a gift tag that was a free make and take at the last scrapbook convention.

The nativity is actually one of the free fonts that I've gotten from dafonts.com

I really like the christmas tree but hubby said "no". It took him too long to realize it said Merry Christmas.

Oh, well, back to the drawing board.

Thursday, October 21, 2010

Christmas Cards

Well, once again I've fallen behind in keeping this blog current! I've also fallen behind in figuring out what to do about Christmas cards.
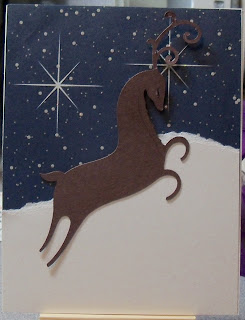
Here is the start of what will (hopefully) be a short process and I counting on the card-making muse to visit my house and inspire me!

All of these were cut with my Cricut using Sure Cuts a Lot software.

For the tree I used my Cri-Kuts gel pens in my Cricut and then cut the tree out.

These were all pretty easy but not really what I was looking for. Guess I'll have to keep trying!

Thursday, October 7, 2010

SVG Files

Well, I really love my new Sure Cuts A Lot but have discovered a sad, sad fact. I have no designing talent!

But I am pretty good at searching out the people who are. My latest find is an extremely talented lady from Sweden.

If you are in need of some new files to cut be sure to check out her website.

Monica's Creative Room

She has some really beautiful frames to download, among other things.

Thursday, September 16, 2010

Skin Diver


This is my dad's birthday card. He has always loved SCUBA diving. I used the Cricut cartridge H2O. The water is actually pre-textured paper and I just love it.

There was some paper piecing here but not a lot.

The "happy birthday" is a rub on.

Friday, September 10, 2010

Sure Cuts A Lot

This is what Cricut should have been! I bought this program because I've gotten tired of the exclusivity that Cricut has started. I don't like being told "look at this great new cartridge, but you can only buy it on the third Sunday in June when the moon is full!".

Sure Cuts A Lot (SCAL) is simply a program that you install on your computer. It looks a lot like Design Studio but more. It will cut any font on your computer (and we all know how many free fonts there are out there!) using your cricut machine. You can also import images files and the program will detect the lines in the image and it will cut those also.

There are also a lot of web sites that sell images, pre-made and ready to cut. You can buy one, two or 10, just buy what you need.

I am loving this program so far. It does so much more than Cricut and Design Studio, well worth the money! You can buy this program just about anywhere. Amazon sells it. I bought mine from Craft Edge.

Saturday, May 29, 2010

Virtual Stamp Night

Geez!! Can you believe that I'm actually posting something here? Life sort of got in the way but I wanted to post the cards I am making during Splitcoaststampers Virtual Stamp Night.

This is one of the ways I get new ideas and pull myself out of a "stamper's slump".


Thursday, February 4, 2010

Valentine Fortune Cookies

Reposting this just in time for the big day!! Enjoy


Here's my latest creation!! A Valentine Fortune Cookie for those you love!

These are quick and easy and don't cost much.
With all of the beautiful paper out there you're sure to find some to please everyone!!

I used Stampin' Up! paper because it has a nice weight to it and I don't fret about tearing it.

The supplies you'll need are minimal. Something to cut circles with. Any size will do, just depends on how big you want your "cookie". You'll also need some plain white paper to use for the fortune which you will either stamp a message on or hand write one.
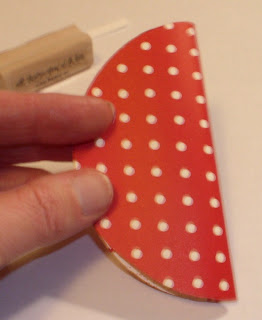
After cutting out your circle, fold it in half and crease it good.

Then you'll want to fold it in quarters but only crease the very tip, otherwise you'll get a fold line down the middle of your "cookie".

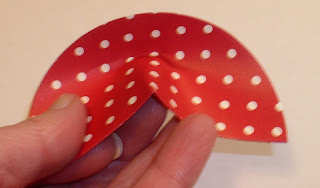
shape. You same time in order to form the fortune cookieNow comes the hard part. You're going to have to force the paper to bend two different directions at the want to bend the cookie in the middle in the upwards direction while at the same time forcing the curved portion to fold down and up. It's a little confusing but once you start to fold it you'll understand more and hopefully the pictures will help.

Finally, you'll want to put some STRONG double sided tape at the inside center fold (where the black circle is), that will help to keep the cookie folded.

Then just stick your message in the cookie so it sticks out a bit!

Have fun!!

 Follow Me on Pinterest